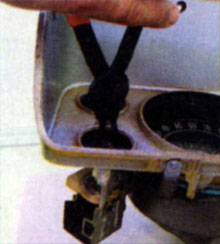
 1. Removing the four mounting screws lets you separate that gauge cluster from the dash bezel. Be careful not to damage any of the grounding straps.
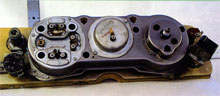 2. From the back, the four mounting bolts and grounding straps for the gauge cluster are visible. Note that this clock has been out of the dash before as evidenced by the pencil marking on the back.
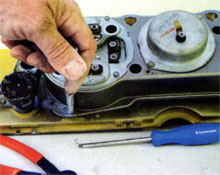
 3. Fold-over tabs hold the gauge cluster face to the unit. Carefully bending these tabs back allows you to complete disassembly of the cluster. To add a factory-style tach this step may not be necessary, but due to age and wear, our unit was in for a thorough cleaning.
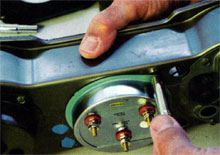 4. Unscrew the two mounting screws on the factory clock. The OPG tach is a perfect-fit replacement.
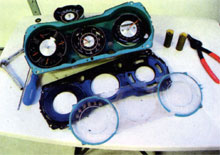
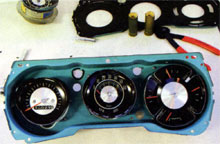 5. The tach fits neatly in place. The speedometer and engine-information cluster, along with the housing, needed a little upkeep prior to reassembly. We carefully cleaned the entire area.
 6. The plastic gauge lense was another matter. Through years of cleaning the face had received a lot of scratches and clouding. Plastic Polish, like that available from Mothers, was used with light pressure to bring the luster back. Take real care: So as not to affect the numbering scaled on the backside the unit is set on a piece of soft foam rubber.
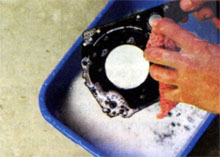 7. A more rigorous cleaning was in order for the cluster faceplate. We used mild dish soap and water with a light touch to get 41 years of stuff off.
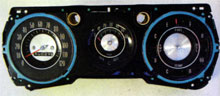 8. The improvement is drastic with the faceplate and lens back in place on the gauge cluster.
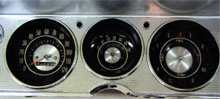 9. Reversing the disassembly process, the gauge cluster is positioned onto the new True Connections bezel. With the grounding straps back in place, the four mounting screws are inserted and tightened to snug only to avoid potential damage. The end result is one dramatic improvement that will give a clear view of engine vitals and miles of motoring smiles.
 TOOL TIPS: Most all Chevelle owners know the trick behind disassembling the key lock assembly. A simple paper clip unfolded and inserted into the hole next to the key unlocks the tumbler mechanism from the rest of the unit. After fumbling for a while trying to remove the mounting nuts on the wiper and light switches, we found that snap ring pliers were the perfect tool. The pliers‘ tips are inserted into the two holes found on the mounting nuts. Only slight pressure was required to remove each. More important is that during reassembly there was virtually no risk of scratching our new bezel surface.
