 1. After we unpacked our Goodmark SS hood, we wanted to check the seam fit and alignment before we started the paintwork. After we bolted the hood onto the hinges, we made a few minor adjustments so that the hood fit squarely between the fenders with a 3/16-inch gap on all seams.
 2. We also checked the levelness along the top of the fender lines and the cowl panel. This hood matched evenly on both planes.
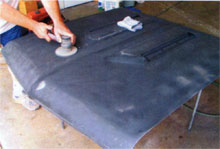 3. Once we found that the hood fit correctly, it was time to begin our at-home bodywork and paint. Our first step was to sand down the hood‘s top surface with a DA (dual-action) sander with 180-grit sandpaper attached. This was done to expose any high or low spots and to rough up the surface before we sprayed primer on the hood.
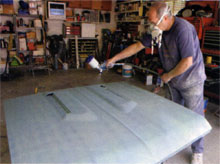 4. After the hood was sanded and blown off to remove any dust, we added about three coats and self-etching primer. This primer is a 50/50 mix of primer and phosphoric acid. The blend allows the mixture to bite into the metal and lock in.
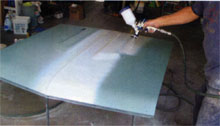 5. Next we added a few coats of waterborne primer sealer. In many locales this product is required to reduce emissions from the paint as it is drying. Unlike traditional paint that dries as a high level of solvents evaporates, waterborne paint is comprised of a partial mix of water and water-soluble solvent. This reduces the total amount of VOC (volatile organic compounds) that evaporates into the atmosphere. Our friend Tom Ocasek, who helped us with our painting project, has used waterborne paints for years without any paint durability problems.
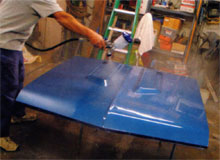
 6. The basecoat that was matched to out Malibu‘s existing color was next to go on. To match a car‘s color, simply stop by a DuPont paint distributor store with a sample of the color. At the store, a DuPont technician will use a portable hand-held color measurement instrument (Acquire RX) to read the color and furnish a formula. A cowl panel often works well as a sample.
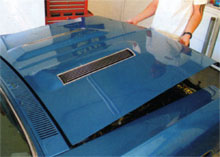
 7. With the basecoat allowed to dry for about 30 minutes, we added a few coats of clear. The clear coat protects the paint from UV rays and pollutants. After the clear coat dried, we color sanded the topcoat with 3,000-grit paper and polished the hood for a glistening shine.
 8. Next we installed the stimulated hood air scoops by aligning the four mounting studs and two guide pins on each side. Once the scoop was down in place, we tightened the sheetmetal nuts onto the four mounting studs. Each stimulated scoop includes a foam gasket so it does not scratch the hood or allow large amounts of water to leak onto the top of the engine.
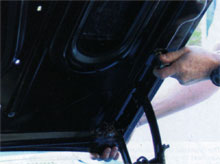 9. Each hinge uses two 3/8-inch coarse bolts to hold the hood down. Be careful that you do not install bolts that are too long, which, when tightened, can dimple the hood‘s top panel from the inside up. All of the mounting holes, both to the hood and the fender, are elongated so that necessary adjustments can be made easily.
 10. After we adjusted the hood, we checked the up and down operation and lubed the movement points on the hinges and the hood latch with engine oil.
 11. The SS grille kit from OPG came with the center grille, two headlight bezels, outer grille extensions, and a front hood edge molding. The ‘67 Chevelle Super Sport kit included an SS396 grille emblem, Chevelle emblem for the left front of the hood, Super Sport quarter panel nameplates, and an SS396 rear panel emblem. A ‘67 Super Sport grille is not only painted differently, but it is also stamped differently than a Malibu‘s grille. The end vertical openings on an SS grille are open (arrows) and are solid on a Malibu grille.
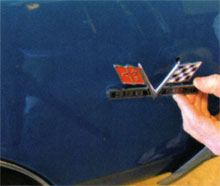
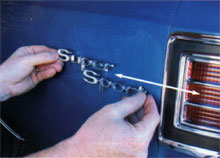 12. To position the rear Super Sport emblem we matched it up so that the horizontal area between the words Super and Sport was positioned generally in line with the center tri-section of the rear red plastic taillight lens (arrows).
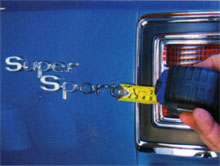 13. The rear portion of each emblem should also measure about 7/8-inch away from the front of the rear taillight bezel. This is true for both sides.
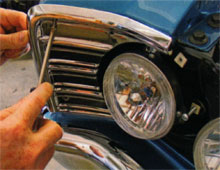 14. The front outer grille bezels (outside of each headlight) were installed by securing one hidden nut to a stud (behind the fender) and three sheetmetal screws.
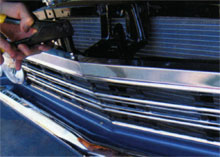 15. The SS grille attached by securing an assortment of bolts and rivets at the bottom and eight rivets across the top.
 16. Extra care must be taken when installing the front 396 Turbo-Jet emblems. So that we didn‘t make any mistakes, we made a quick template by placing a piece of clean notebook paper over the bottom of the emblem and allowing the four studs to pierce the paper. Next we roughly cut around the emblem and removed the paper. Using the paper template, we positioned it on the fender so that the rear-facing chrome on block‘s bottom edge of the 396 emblem was even with the top of the wheel opening. The front space of the emblem‘s forward-facing chrome block should be placed 7 inches from the front edge of the fender. With the template in place, we marked the holes with a felt-tip pen and then drilled four 3/16-inch holes, and installed the emblem.
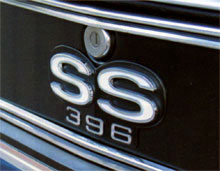 17. On the rear emblem we again made a paper template and positioned it directly below the lock cylinder. We scribed the holes with a felt marker, drilled them out with a 3/16-inch bit, and installed the SS emblem.