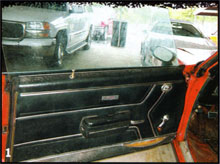
 1. The original door panels have seen better days. Not only are they ripped and warped, but the cardboard backing is also covered in mildew and mold from years of leaky windows. Time for an upgrade.
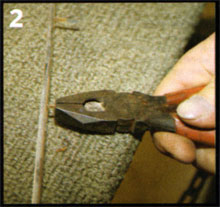 2. The stainless steel trim was removed by prying the tabs out, then the tabs were straightened with pliers and set aside for reinstallation.
 3. Before the old panel was removed, the metal upper backing plate was marked with a felt-tip pen to locate the new panel. Once marked, the cardboard peeled right off.
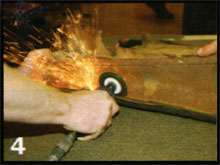 4. The original window felts were stapled on; these needed to be removed to complete the installation. A die-grinder and cutoff wheel made quick work of the staples.
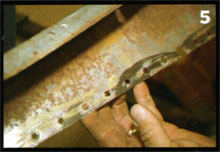 5. Again using the die-grinder, the original star-punch holes were ground off leaving a flat, uniform surface to mount the new panel. We also hit the metal with a Scotch-Brite Roloc pad on a die-grinder to clean up the surface rust and residual adhesive.
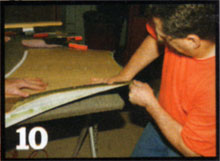
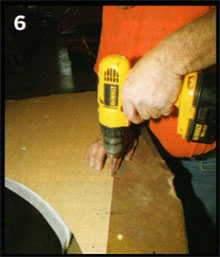 6. The new panel was laid against the backing plate along the line we marked earlier. A couple of clamps held it in place while the backing board and metal support were drilled approximately every 6 inches.
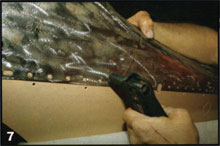 7. Using a generic pop-rivet gun, the two pieces were joined together. This was much easier and more secure than trying to reuse the original punched holes.
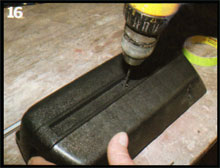
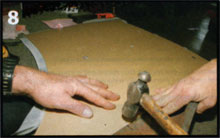 8. The backside of the rivets needed to be knocked down so the panel would sit flush against the body. A 2x4 block and a hammer flattened them nicely.
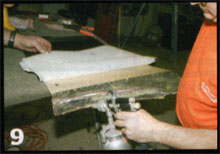 9. While rattle-can spray glue is OK, much better results will be obtained by using high-quality spray adhesive and a cheap paint gun. The glue is available from most any upholstery shop. The glue was sprayed on the metal backing plate.
 10. The fleece was stretched first, then the excess trimmed off. More glue was sprayed on, then the vinyl was stretched over the panel and wrapped around the underside of the metal panel.
 11. The stainless trim was given a quick cleaning with a piece of steel wool. This little trick brought the trim back to a bright luster.
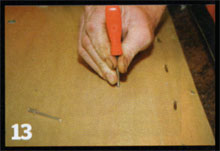
 12. The new panel comes prepunched for the trim, but the holes didn‘t line up. The trim was laid on the panel and a piece of tape was marked to locate the holes. Then the panel was drilled in the correct places. The carpet was pulled back to clear the drill bit. When installed, the trim will cover the edge of the carpet.
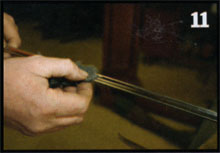
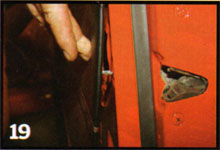
 13. The GTO has three pins that require the vinyl to be pierced. This was accomplished with a small pick tool.
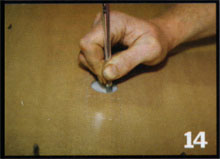 14. A window-crank hole was cut with a razor knife. If the car had been equipped with power windows, the panel would have accepted the switch by cutting out the perforated sections.
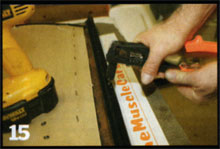 15. The window felts were drilled and riveted to the metal backing plate to complete the rebuild.
 16. The original plastic armrests were cracked and crumbling from years of UV exposure. The new OPG pieces were drilled for the stainless trim inserts.
 17. The front and read armrests also had new soft pads installed. The rear armrests came fully assembled with trim ashtrays.
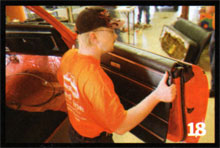 18. The installation was simple, just like removal. The top went on first.
 19. Redline installed new pushpins in the panels. These will require some adjustment when installing the panel.
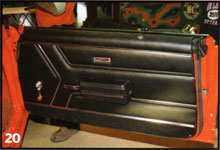 20. All done, the new door panels really set off the interior and add that new-vinyl smell. Much better than mildew.
